
Customer Portal
The Customer Portal is a branded, password-protected space you give your own customers so they can sign in and look after their own record themselves — a mortgage borrower reviewing their credits, a coworking member updating their profile, a client downloading invoices. Each person sees only their own data, and you decide exactly which fields they may view or edit.
What is the Customer Portal?
Section titled “What is the Customer Portal?”The Customer Portal turns any record type in your workspace into a self-service area your end-customers can log into. A real-estate broker can let each borrower check their file and add the properties they own; a coworking space can let every member update their contact details and download receipts. Nobody ever sees anyone else’s data, and no database jargon — no IDs, no field codes — is shown to the customer.
Giving customers a place to help themselves is what most of them already want. As Harvard Business Review reported in “Kick-Ass Customer Service,” “Across industries, fully 81% of all customers attempt to take care of matters themselves before reaching out to a live representative.” (Dixon, Ponomareff, Turner & DeLisi, HBR, Jan–Feb 2017). The portal meets that expectation: routine questions like “what’s my balance?” or “can I update my address?” are answered without an email to your team.
The portal is fully self-serve to set up — a six-step wizard, no developer needed — and it reuses the same permission rules that already protect your workspace, so a customer can never reach a record that isn’t theirs. To understand where the portal fits alongside the rest of HARi, start with the introduction.
How your customers sign in
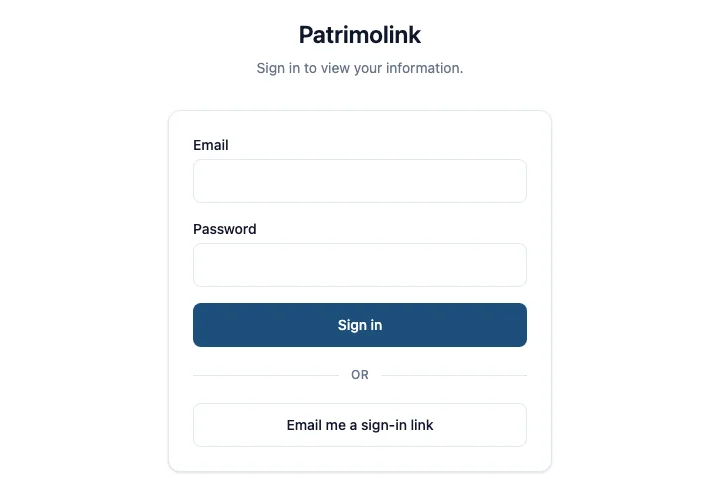
Section titled “How your customers sign in”Your customers can sign in four ways, and you choose which methods to allow. Every method lands on a branded page carrying your logo and colours — it feels like part of your own website, not a generic login.
Magic link (passwordless)
Section titled “Magic link (passwordless)”The customer enters their email and receives a one-time sign-in link, valid for 10 minutes and usable once. There’s no password to remember or reset — clicking the link signs them in. This is the lowest-friction option and works well for customers who visit only occasionally.
Email and password
Section titled “Email and password”Customers who prefer a traditional login can set a password and sign in with it. To protect accounts, five failed attempts lock that email out for 15 minutes, which stops password-guessing without you having to manage anything.
Self-signup versus staff invite
Section titled “Self-signup versus staff invite”You decide how customers get their first access:
- Email-verified self-signup — customers register themselves and confirm their email address before they can sign in. Best when you want customers to onboard without you lifting a finger.
- Staff invite — a teammate clicks “Invite to portal” on a record; the customer receives an invitation, claims the account, and sets their password. Best when you want to control exactly who gets in.
What customers can see and do
Section titled “What customers can see and do”Inside the portal, customers manage their own information through a simple side navigation — no training required. Everything they see is filtered to their own record, and everything they can change is limited to the fields you allowed.
Their profile
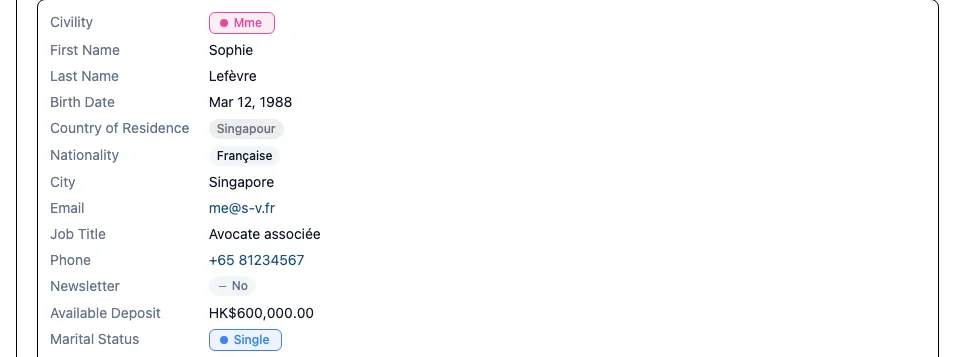
Section titled “Their profile”Customers view their own profile and, where you allow it, edit it — correcting a phone number, updating an address, adding a detail you asked for. A profile-completion bar nudges them to fill in what’s still missing.
Invoices and PDFs
Section titled “Invoices and PDFs”Customers see the invoices linked to them and download each one as a PDF. It’s the same invoice you issue from HARi — no re-keying, no separate billing tool for them to learn.
The document vault
Section titled “The document vault”Any file a teammate marked as customer-visible appears in a document vault the customer can download from. Contracts, statements, welcome packs — you control which files are shown; everything else stays private.
Subscription preferences
Section titled “Subscription preferences”A preference centre lets customers manage the marketing lists they’re on — opting down or out entirely. Transactional emails (things like invoices and account notices) are shown as always-on and can’t be switched off, so essential messages always reach them.
Their own records and collections
Section titled “Their own records and collections”Where a customer owns repeating records — a borrower’s properties or credits, for example — those appear as editable collections. The customer can add, edit, and remove items in their own collection, keeping their file current without a call to your team.
Account and privacy
Section titled “Account and privacy”Each customer has a small account area with self-service controls: the profile-completion bar, a Download my data export (for GDPR/PDPO subject-access requests), the option to close their own account, and a logout button. Customers stay in control of their own information.
Setting up the portal
Section titled “Setting up the portal”Setting up the portal takes six guided steps in the admin wizard, plus a preview and a publish. You can open the wizard, work through the steps in order, and preview the result as a customer before anything goes live.
Step 1 — Records
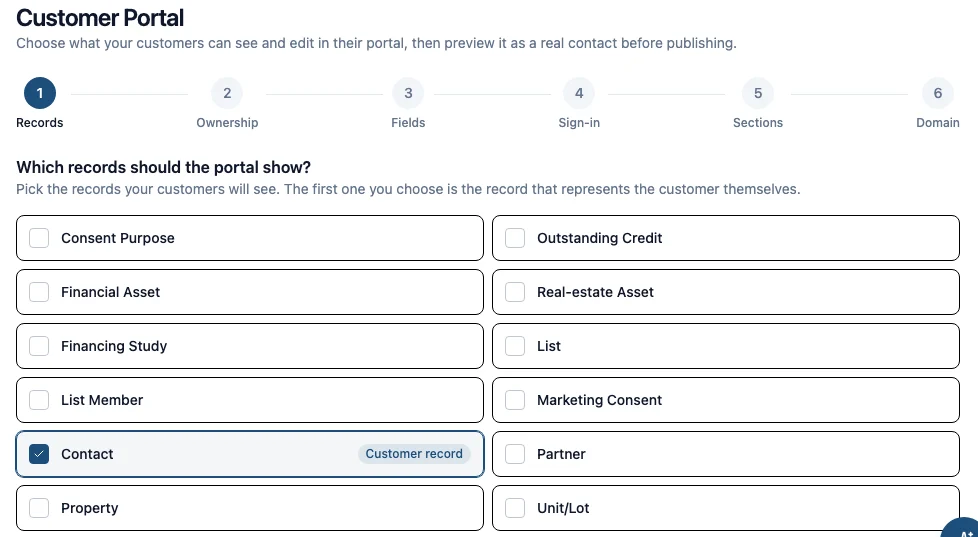
Section titled “Step 1 — Records”Choose which record types to expose in the portal. Tick the entities your customers should be able to sign in and see — Contacts, Invoices, or any custom record type you’ve built.
Step 2 — Ownership
Section titled “Step 2 — Ownership”Tell the portal which field ties a record to the customer looking at it. It can be the record itself (the customer is that contact) or a relationship — for example, a property belongs to the borrower. This is what guarantees a customer only ever sees their own data.
Step 3 — Fields
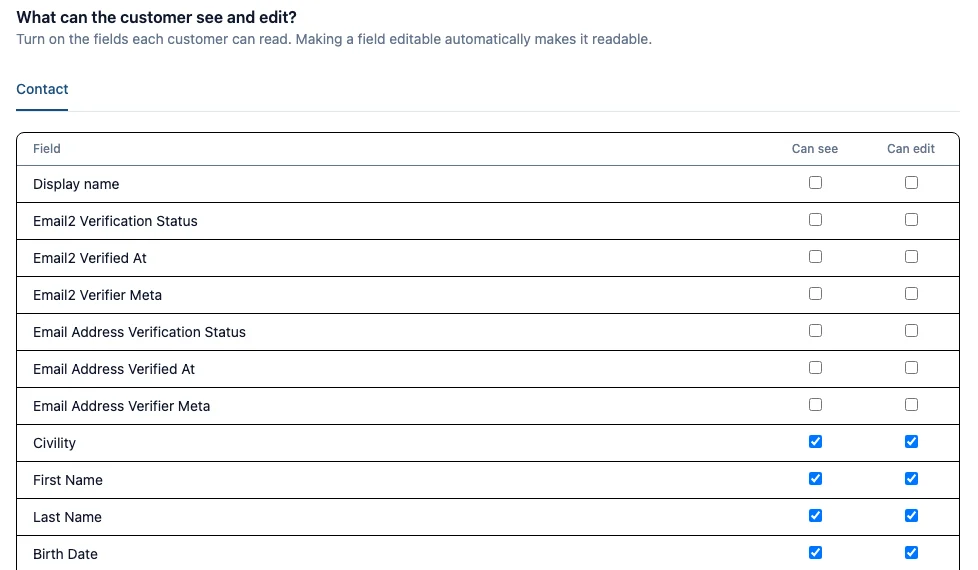
Section titled “Step 3 — Fields”Decide, field by field, what each customer can see and what they can edit. A field can be visible but read-only, visible and editable, or hidden entirely — you’re in full control of the level of self-service.
Step 4 — Sign-in
Section titled “Step 4 — Sign-in”Pick the sign-in methods to allow (magic link, password, or both) and whether customers can self-sign-up or must be invited by your team.
Step 5 — Sections
Section titled “Step 5 — Sections”Turn each portal section on or off. Every section (profile, invoices, documents, preferences, account) can be set to Auto, On, or Off — see Turning sections on and off below for what Auto decides.
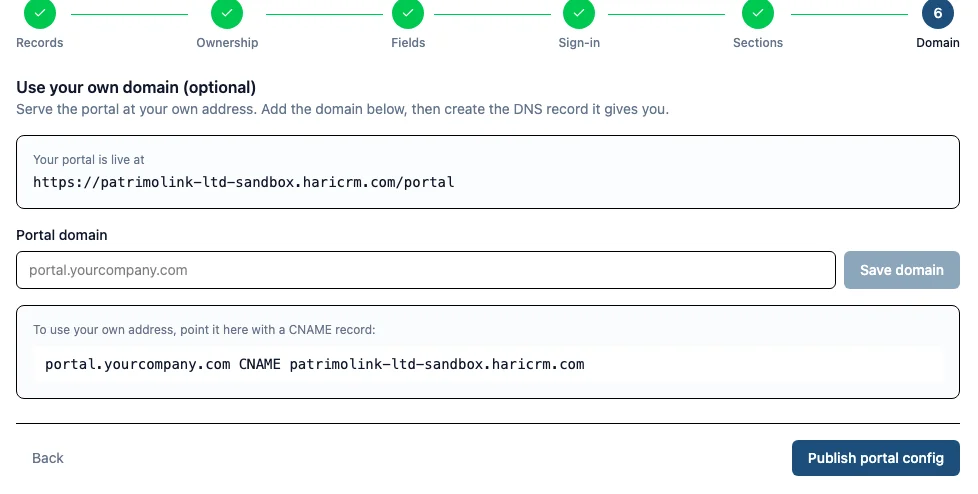
Step 6 — Domain
Section titled “Step 6 — Domain”Confirm the portal address. Your portal is instantly live on a ready-to-use address, and this step is also where you connect your own domain and watch it verify.
Preview as a customer
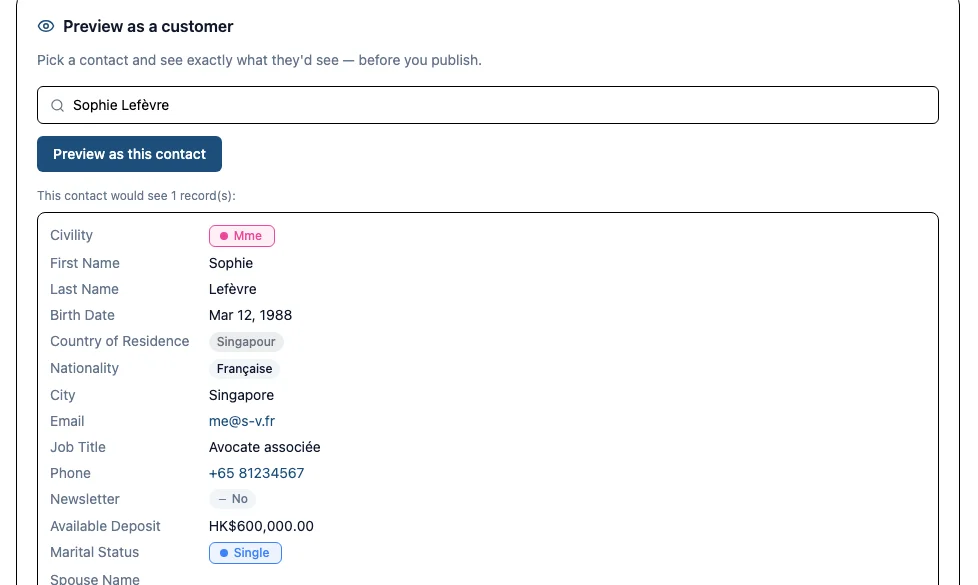
Section titled “Preview as a customer”Before publishing, click Preview as a customer to see the portal exactly as an end-customer would — the login, the navigation, their profile, their records. It’s the fastest way to confirm you’ve exposed the right fields and nothing more.
Publishing
Section titled “Publishing”When the preview looks right, click Publish. The portal goes live for your customers immediately. You can return to the wizard and re-publish any time you want to change what’s exposed.
Your portal address
Section titled “Your portal address”Your portal is live the moment you publish, on a subdomain of your workspace — with no DNS setup at all. You can keep that address, or move the portal onto your own domain when you’re ready.
Your default portal address
Section titled “Your default portal address”Every workspace gets a portal at your-workspace.haricrm.com/portal automatically. There’s nothing to configure — no DNS records, no waiting. Share that link with your customers and they can sign in straight away.
Moving to your own domain
Section titled “Moving to your own domain”When you want the portal to live under your own brand, point a domain you own at HARi with a single CNAME record. The wizard shows a live linked / unlinked status so you can tell at a glance whether the connection is working — no guessing, no support ticket to check.
Privacy and security
Section titled “Privacy and security”Privacy is built into how the portal works, described here in plain terms. Three guarantees hold at all times:
- Each customer only ever sees their own data. The ownership rule you set in the wizard filters every screen, so one customer can never reach another’s record.
- Sign-in uses a secure session. Magic links expire and are single-use; passwords lock out after repeated failures — the account stays protected without you managing anything.
- You control exactly which fields are visible versus editable. A field the customer shouldn’t change is read-only; a field they shouldn’t see isn’t there at all.
Because the portal reuses your workspace’s existing permissions, tightening access in one place tightens it for the portal too. And customers can export their own data at any time, which supports your GDPR/PDPO obligations without extra work for your team.
Turning sections on and off
Section titled “Turning sections on and off”Each portal section can be set to Auto, On, or Off, and Auto is the sensible default. Auto shows a section only when it’s relevant — for example, the invoices section appears only if you’ve exposed invoices and the customer has read access to them, and the documents section appears only when a customer’s own record has at least one customer-visible file.
Set a section to On to always show it or Off to always hide it, overriding Auto for that one section. This lets you tailor the portal to each business: a coworking space might turn invoices on and documents off, while a broker turns both on. Profile, account, and preferences are always available so customers can manage themselves and stay in control.