Add a Custom Field
Add a Custom Field
Section titled “Add a Custom Field”Every business tracks different data. HARi CRM lets you add custom fields to any entity so you can capture exactly the information your team needs.
Supported Field Types
Section titled “Supported Field Types”HARi supports these field types:
- Short text — Single-line text (names, short descriptions)
- Long text — Multi-line text (notes, comments)
- Rich text — Formatted text with bold, lists, links
- Integer — Whole numbers (quantity, count)
- Decimal number — Numbers with decimal places (price, dimensions)
- Money (currency) — Money values, paired with the workspace currency
- Percentage — A value from 0 to 100
- Rating — A 1-to-5 star rating
- Date — A calendar date
- Date + time — Date and time combined
- Yes / No — A boolean toggle
- Single choice — A dropdown with predefined choices
- Multi-select — Multiple choices from a list
- Email address — Email with validation
- Phone number — Phone with international country code selector
- URL — Web address with validation
- Linked record — A reference to another entity’s record
- File / Image / File list / Image list — File uploads
- Structured data (JSON) — Free-form JSON
- Colour — A hex colour picker
- Auto number — Sequential identifier generated on create
- Secret — A masked text value (e.g. API key)
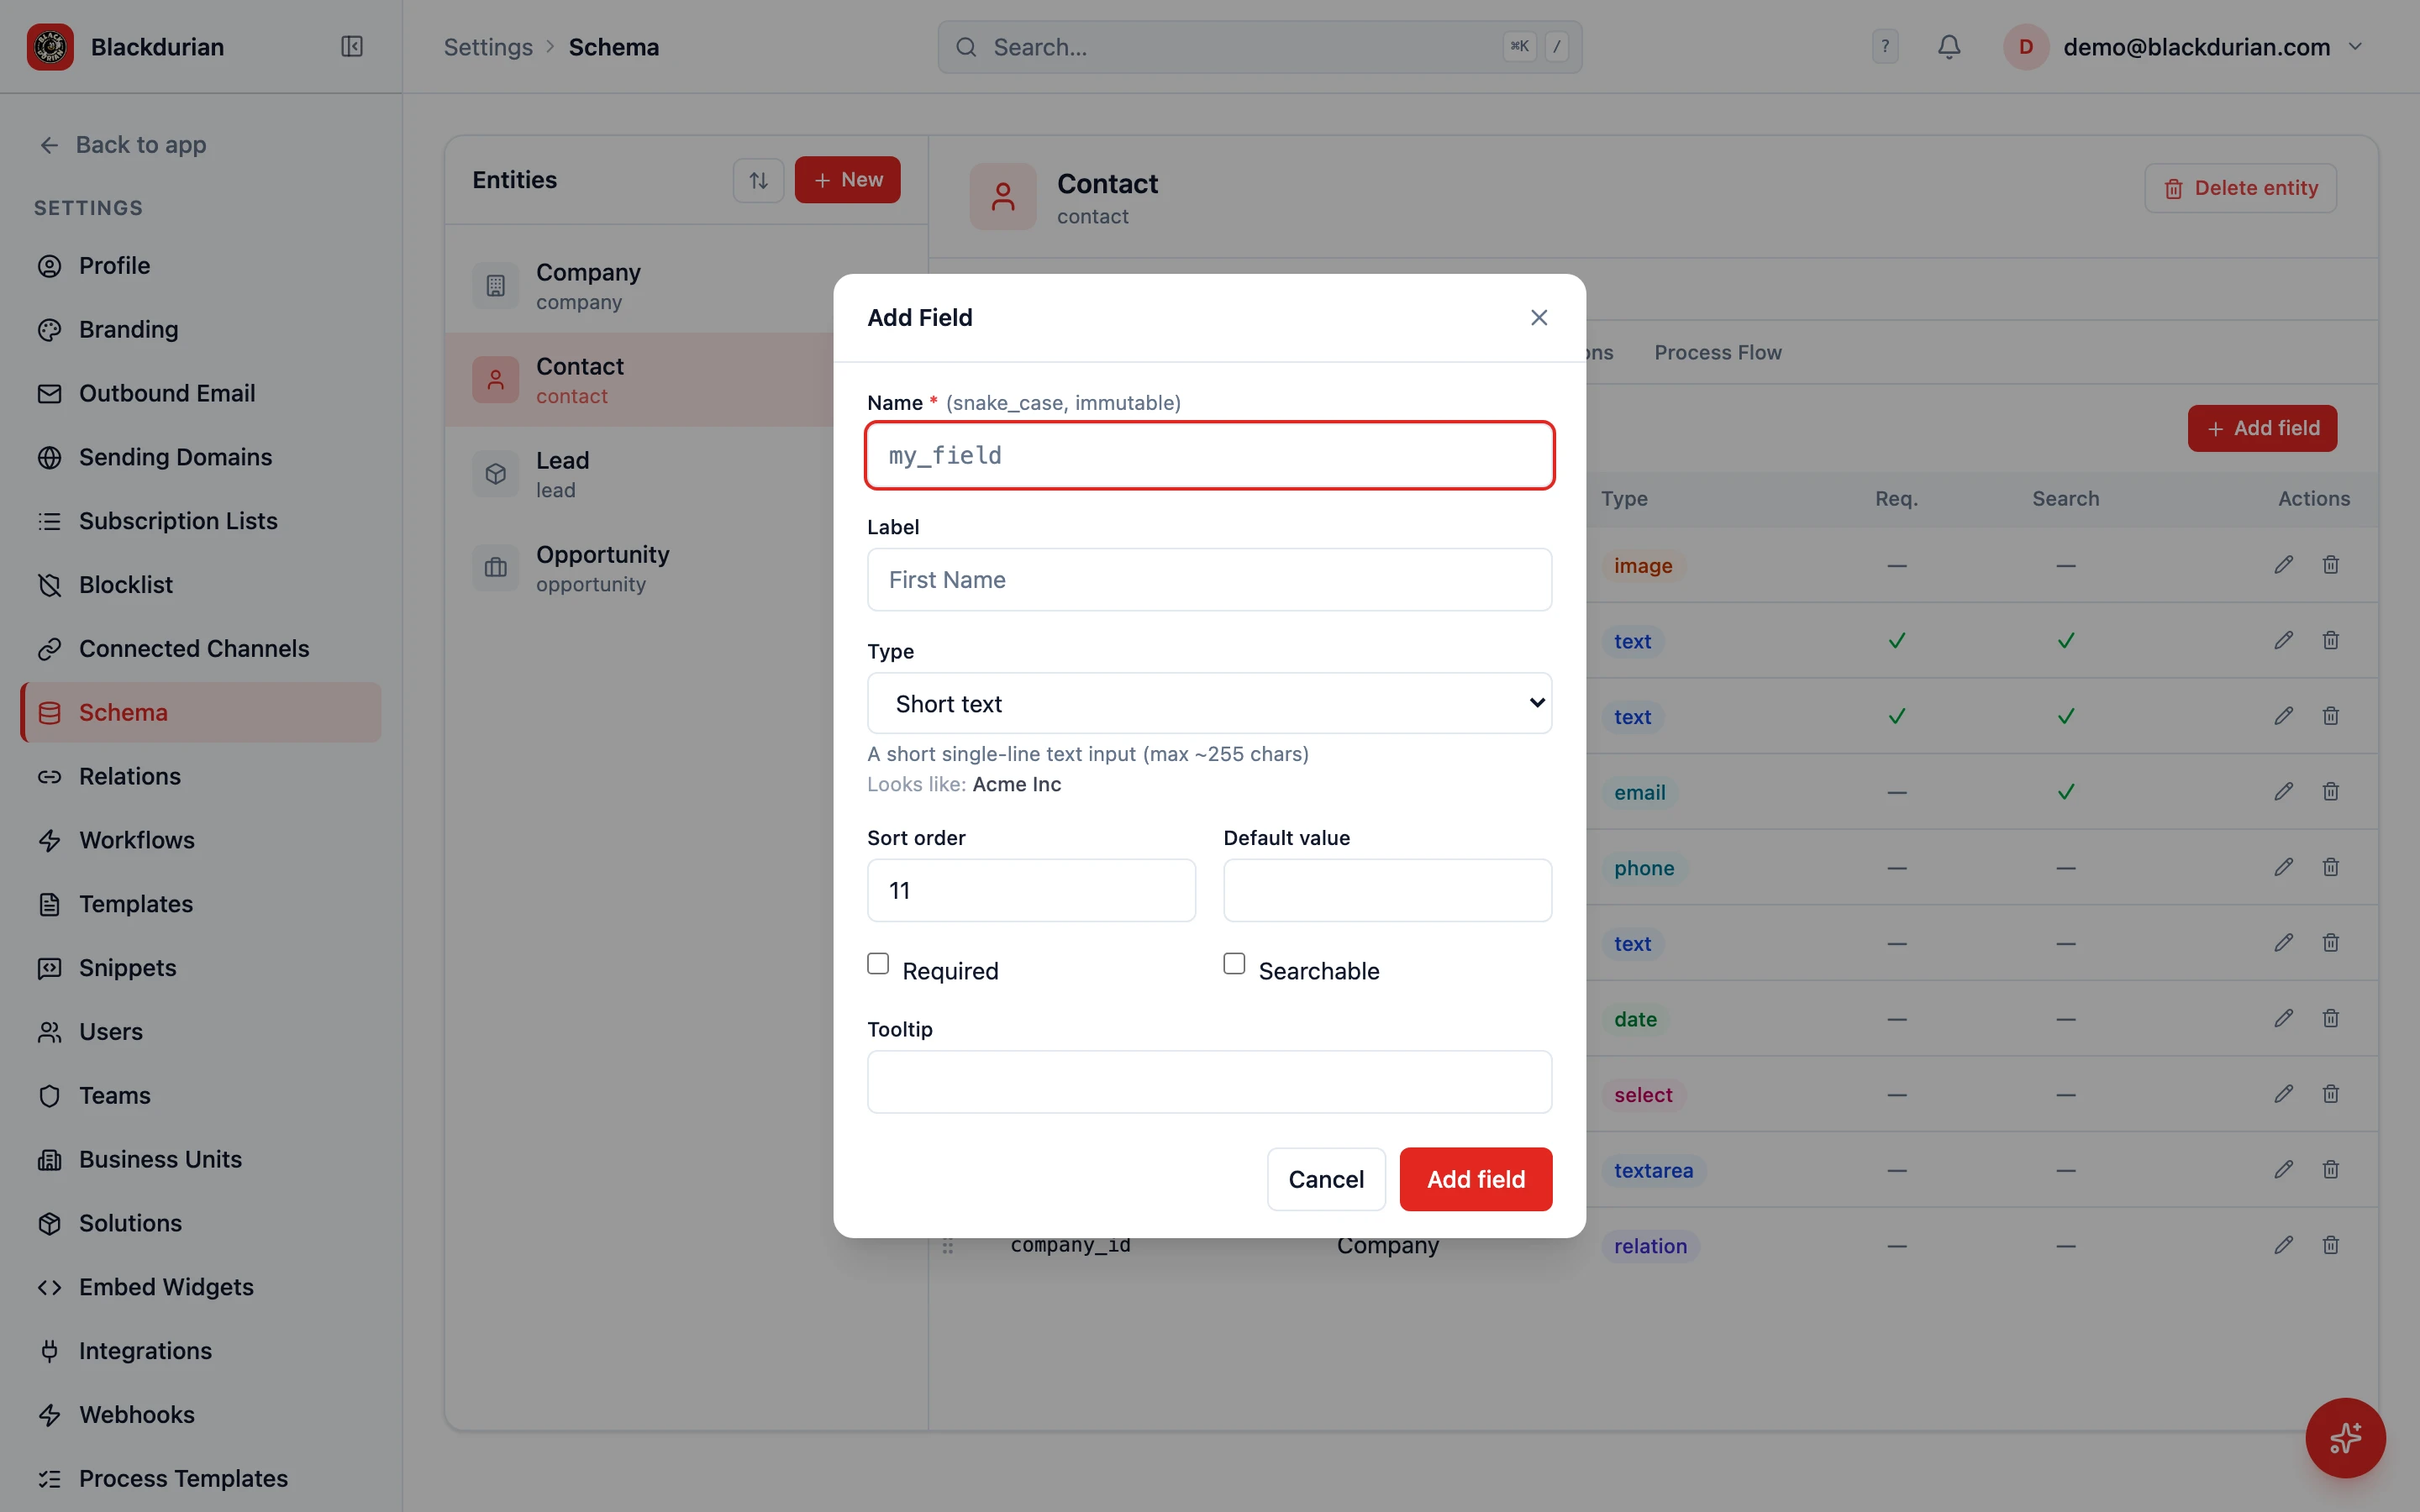
Adding a Field
Section titled “Adding a Field”- Go to Settings > Schema
- Select the entity you want to add a field to (e.g. Contact, Company, or any custom entity)
- Click the Fields tab
- Click Add field
- Configure the field:
- Label: The name users will see (e.g. “LinkedIn Profile”)
- Name: A machine name (immutable once saved)
- Type: Select from the list above
- Required: Toggle on if this field must be filled in
- Recommended (advisory): Toggle on to nudge users to fill the field without forcing them (see below)
- Default value: Optionally set a default
- Click Save
The field is now available on the entity’s form and can be used in views, filters, workflows, and reports.
Required vs Recommended Fields
Section titled “Required vs Recommended Fields”HARi gives you two levels of “please fill this in”, marked with a star next to the field label on the form:
- Required (red ★) — a hard rule. The record will not save while a required field is empty; the save is blocked and the field is flagged until you fill it. Use this for data you genuinely cannot do business without (a contact’s name, a deal’s value).
- Recommended (advisory) (blue ★) — a soft nudge. Leaving a recommended field empty does not block the save. Instead, when you try to save, HARi shows a non-blocking “save anyway?” prompt so you can either go back and fill it or proceed. Use this for fields that improve your data quality but shouldn’t stop someone entering a record quickly (a job title, a phone number, a lead source).
Both are configured the same way: edit the field in Settings > Schema on the Fields tab and tick Required or Recommended (advisory). A field is one or the other, not both — Recommended is the gentler option when “required” would slow people down too much.
Configuring a Phone Field
Section titled “Configuring a Phone Field”Phone fields automatically include a country code selector. On embed forms (public forms), the default country code is detected from the visitor’s browser locale.
To set a specific default country code for a phone field:
- Edit the field in Settings > Schema on the Fields tab
- In the field’s options, set
default_country_codeto your preferred dial code (e.g.+852for Hong Kong,+65for Singapore) - Save
Phone numbers are stored in international format (e.g. +85263131007), which makes them ready for click-to-call, WhatsApp links, and international dialing.
Configuring a Single Choice Field
Section titled “Configuring a Single Choice Field”If you choose the Single choice type (or Multi-select):
- After selecting the type, add each option value (e.g. for a “Priority” field: “Low”, “Medium”, “High”, “Critical”)
- Set the display order by dragging options
- Optionally, set a default option
- Save
Field Placement on the Form
Section titled “Field Placement on the Form”After creating a field, you may want to position it on the record form:
- Go to the entity’s Forms tab in Settings
- Drag the new field to the desired position within a tab and section
- Save the form layout
- Use descriptive labels — “Annual Revenue” is clearer than “Revenue”
- Use the right type — Do not use Text for data that should be a number or date. Correct types enable filtering, sorting, and calculations.
- Required fields sparingly — Only mark fields as required if they are truly essential. Too many required fields slow down data entry.
Next Steps
Section titled “Next Steps”- Customize Form Layout to arrange your new field on the form
- Create a Custom Entity if you need an entirely new entity type
- Create a Saved View to add your new field as a column in a view